Want to know how you can create a website using Elementor Cloud? I have prepared a complete guide on how to create a website with Elementor Cloud in this post.
Elementor recently launched the Elementor Cloud website, which is offering an end-to-end solution to help you create, design, and launch your WordPress website. To create a website manually, you need to follow these steps:
- Register a domain from a domain provider
- Buy hosting from a third-party hosting provider
- Install WordPress on your Website
- Install Elementor plugin to design your website
But now, the process has changed entirely because you will get everything for your website on Elementor Cloud. To explain everything in detail, I have prepared this ultimate guide on how to create a website with Elementor Cloud. I will also explain how you can design your website using Elementor.
Let’s get started right away.
If you are curious to know more about Elementor Cloud, then check our in-depth Elementor Cloud review here.
How To Get Started With Elementor Cloud Website
Follow this step-by-step guide to create your website with Elementor Cloud.
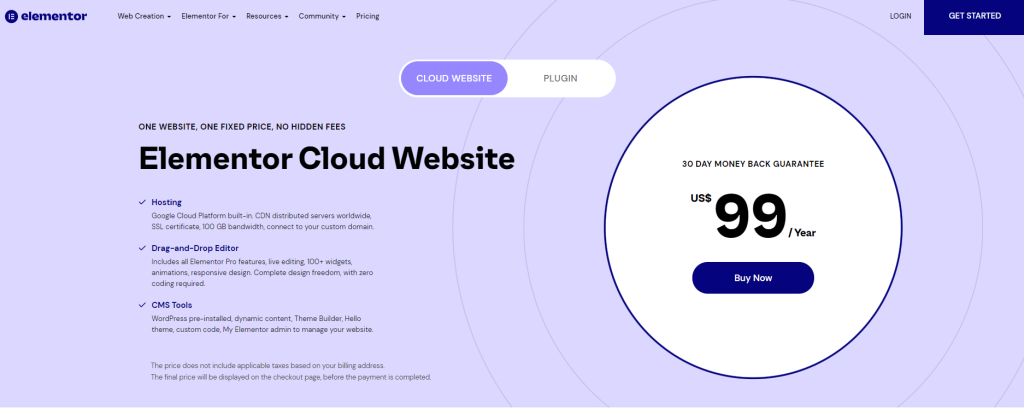
Step #1: Visit the Elementor Cloud website page using this link. You can see the latest pricing and everything you’ll get after purchasing their website plan. To begin your purchase click on the “Buy Now” button.
Step #2: You will be redirected to the checkout page, where they will ask you to create a new Elementor account or log in to an existing one. Once you fill in all the required info, click on the “Create Account” option.
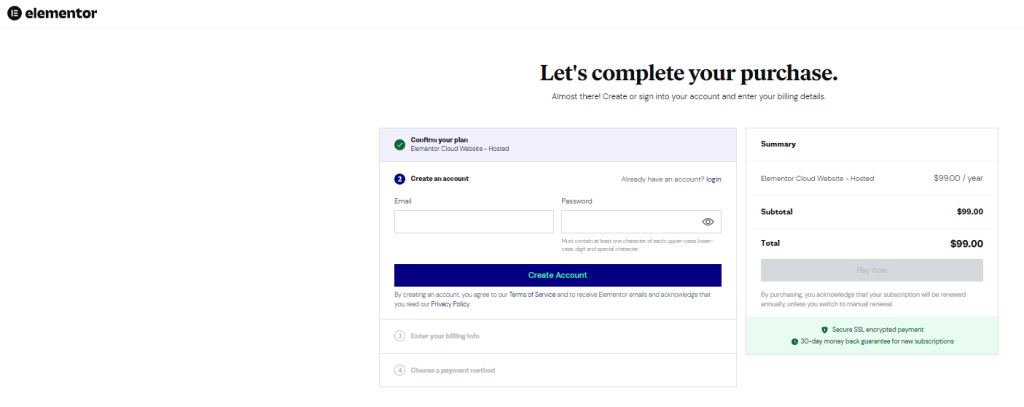
Step #3: In the next step, fill out all the required info in the billing information section. After filling in all the details, select a payment method. If you choose to pay via credit card, then enter your credit card information and click on the “Pay Now” option.
Step #4: Complete your payment to purchase the Elementor Cloud website subscription successfully. The Elementor team will send you an order receipt to your email address and further instructions to complete the setup of your cloud website.
Step #5: Elementor also provides a subdomain in this plan for free. You can choose any name for that subdomain. Your domain will be something like this: [email protected].
Step #6: After choosing the domain name, you will have to wait for a few minutes because they will install WordPress and Hello Theme on your website. Now you can access your website directly from the My Elementor dashboard.
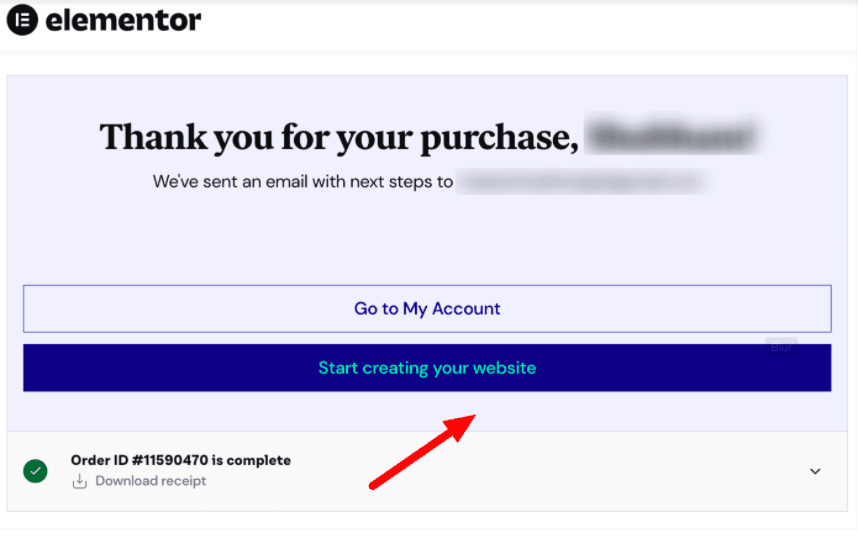
So these are a few steps you need to follow to carefully create a website with Elementor Cloud. If you don’t want to use the Elementor subdomain, then connect the cloud website with your custom domain for free.
How To Design Your Cloud Website Using Elementor Pro?
With Elementor Cloud, the Elementor pro plugin will be pre-installed on your website along with the Hello Theme. You don’t have to worry about any technicalities to start designing your website. Go to the My Elementor Dashboard and select the Open WP Dashboard option to design your website.
Follow these steps to design your cloud website.
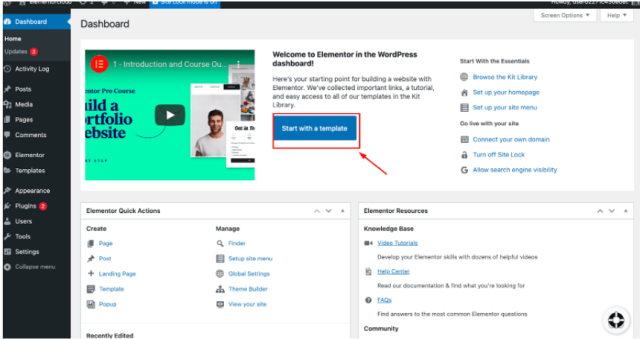
Step #1: On your WordPress dashboard of the cloud website and you will see a “Start with a Template” button. Click on it to see all the template kits of Elementor Pro.
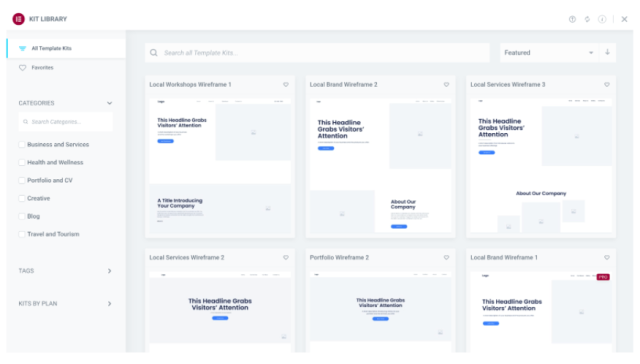
Step #2: You can search for any template via categories in the template kits library. There are hundreds of template kits available there. Search for the template kit which suits your niche.
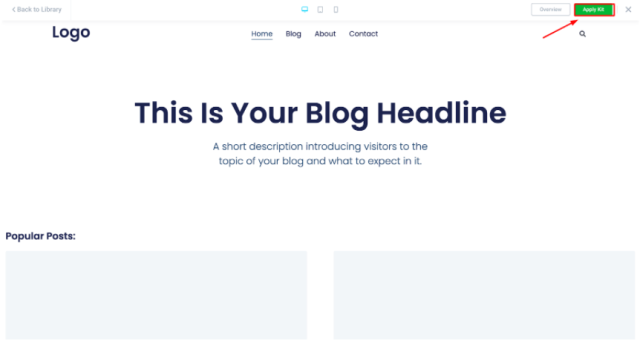
Step #3: Click on the template kit of your choice to see the demo of that website. If you like it, then click on the “Apply Kit” button.
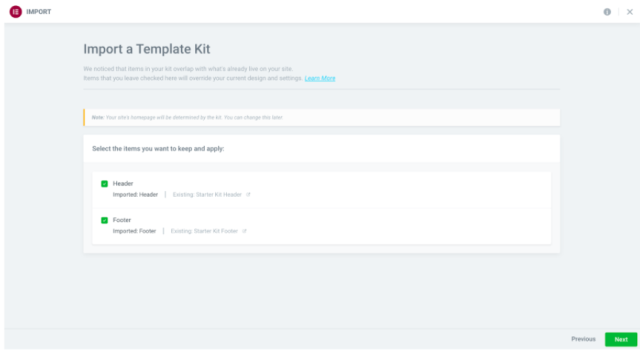
Step #4: Now, you need to select the items you want to keep and apply on your websites, such as header and footer. If you like the header and footer of the template kit, then mark them. If you want to create a header and footer on your own, then uncheck the tick mark boxes. Once you’re done, click on the “Next” button.
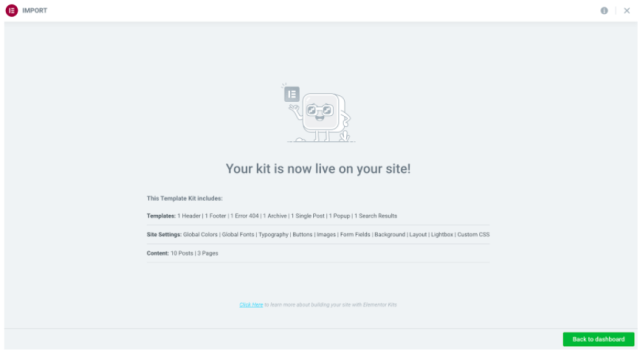
Step #5: The template kit will go live on your website. You can see the templates, site settings, and the content of that template kit which will get imported on your website. Click on the “Back To Dashboard” to go to your WP dashboard.
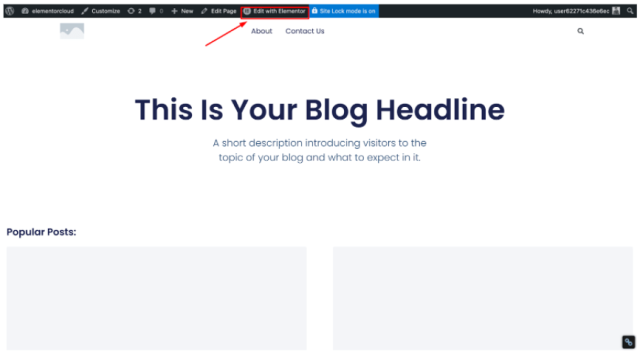
Step #6: Now, visit your website from the WordPress dashboard and then click on the “Edit With Elementor” button to edit your website in real-time.
Step #7: Now, you can make the necessary changes to the template and pages make the website in the way you want.
So this is how you can design your Elementor cloud website with the Elementor Pro plugin. This guide is designed for beginners who don’t know how to use the Elementor plugin. If you already have experience with the Elementor plugin, then you can design the website without using any template kits.
Elementor Cloud Website Pricing
The pricing of the Elementor Cloud Website is very affordable. You can get your Elementor Cloud website at just $99/year. You will get top-notch hosting services from the Google Cloud Platform. It will also provide your website with a secure content delivery network (CDN) by Cloudflare. To secure your website from any malicious activity, you will get an SSL certificate from Cloudflare.
If you already have a custom domain, then you can connect your cloud website with it for free. Your website will be backed up every 24 hours, and you can also perform manual backups from the My Elementor dashboard. They will also provide you 100 GB bandwidth, 20 GB Disk Space, and 100K monthly visits. Your website will also have access to the Elementor Pro plugin and all of its features. To know more about Elementor Pro features check out our detailed Elementor Pro Review.
Conclusion: How To Create A Website With Elementor Cloud [2022]
Elementor Cloud is becoming one of the favorite end-to-end solutions among users. Many website builders are available in the market, such as Wix, Squarespace, Webflow, and more. But with Elementor Cloud, you get all the features of WordPress, Elementor Pro, and the best hosting services from Google Cloud Platform. There is no match in the market for that, in my opinion.
I hope with this guide you can create your website with Elementor Cloud and design it with the Elementor Pro plugin easily. Let me know your thoughts on this guide in the comment section.
This content was originally published here.


