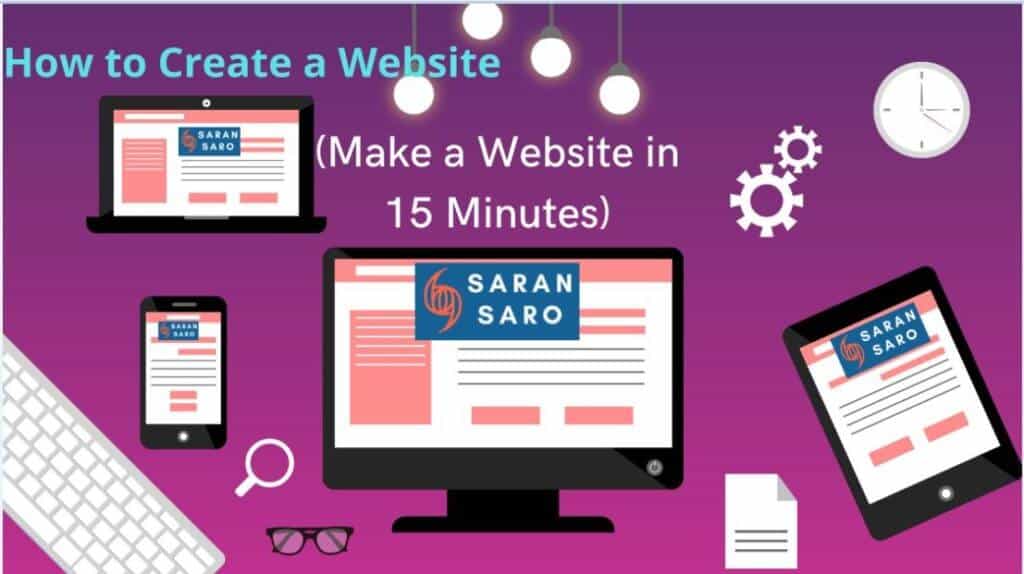
Creating a website was my long-term dream and it was fulfilled when I got this step-by-step guide “how to create a website in 2021″.
In 2021, it’s true that anyone can start a website without having any technical and coding knowledge. No worries, if you don’t know anything about web development or web-design.

If you follow our right tools to create a website then you can easily set-up your first website as quickly as possible.
Our how to create a website guide will help you to build a website from scratch. Also you do not need to spend money for freelancers, website-builders and agencies to build your website.
How to create a website?
What do you need in order to create a Website?
Domain name: Your unique custom web address – www.yoursite.com – example www.saransaro.com.
Website Hosting: Hosting is the service or place that hosts your website on the internet.
WordPress: Free blogging software which is used for website platforms.
To build a 100% functional website, you must need to secure your domain name (web address) and web-hosting. These two factors are very essential in order to access your website online. If any one of this is missing, then you won’t set up a website.
Once you are ready with your domain name and hosting, you are good to go and create a WordPress website now.
WordPress is the popular blogging program or website building platform which is used by 40% of all available websites on the internet.
Setting up your first website is very simple. You can easily build your first website through a one-click process through web-hosting service.
I’m sure, now you might have got some idea of how the website is being built and what are the basic requirements to build a website.
Once you have read this guide “How to Create a Website“, you’ll have a complete idea to create a website. This step-by-step tutorial will help you to have a working website on the internet with your favorite domain name and 100% accessible by others online.
Ready? Let’s start to create a website now.
How to Create a Website (Table of Contents):
1. Choose your favorite domain name (custom)
2. Register your domain and sign up with Web-hosting
3. Set up your website using WordPress (Single Click)
4. Customize your Website
5. Create Pages and Content
6. Set-up a navigation menu for your website
1. Choose a Domain Name
When you plan to build a website, you must first need a domain name.
The domain name is your website name and address. This is the address which is used by the visitors when they find and access your website from their web-browsers.
My website’s domain name is saransaro.com. You need to decide your domain name now.
Domain names will cost $10 to $50 per year. But if you register your hosting service with Bluehost then you will get free domain name for your website.
Below are some tips when you register your domain name to create your first website.
If you’re making your website for a business, then your domain name should at least match your company name. For example – YourCompanyName.com
If you would like to set up a personal website for you then YourName.com would be a great option to start.
Remember, if your goal is to target International visitors like, US, UK then I would prefer to register domain name extension as .com, .org or .net. If your target visitors are your local country then I would recommend going with .in, .de, .au, .uk etc..
You can check the availability of your favorite domain name below.
You will learn below how to get a free domain name when you register web-hosting.
2. Register your domain and sign up Web-hosting Account
Having a domain name is not only enough in order to bring your website online. In addition with your domain name, you must have a website hosting (web-hosting) service.
Web hosting is the service (like a hard disk drive) which stores your website files, images, videos and all other content on a “secure server’ which will be always up and running.
Without a web-hosting, your website is not accessible or live for others to find, read and browse.
You can register an affordable and reliable web hosting service for your website which costs between $3 and $9 a month.
It’s like less than a spending for a snack per day, but it’s an essential investment for your website’s success.
You can choose any web hosting company, but make sure that your web-hosting providers offer below features.
If you’re able to find a web-hosting providing with all above features then you are so lucky. You have found the best web hosting provider for your new website.
We strongly recommend using Bluehost.com for web hosting and domains. Bluehost offers free domain registration for the first year when you register your web-hosting.
Having domain and hosting from the same company will save your precious time and money as well.
You can register your hosting plan for $3 /mo. with our discount link. You will get all essential features from Bluehost hosting provider and you can set-up a website with a single click.
1) To sign up with a Bluehost hosting account, click on the “Get Started Now” button.
2) Now, select your web hosting plan
If you need unlimited features then you can go with Choice plus. Or if you want basic features for your website then go with a basic plan.
After you have chosen your web-hosting plan, click on the “Select” button to start.
Now, you will get a pop-up where you need to select your free domain name.
Make sure that you have selected the .com domain extension.
3) Register your Free Domain name now
We always suggest our readers to register for free domain names such as .com, .org and .net. These extensions will get more visitors globally.
Once you registered your favorite available domain name then click on ‘Next” to create your Bluehost Account.
If you already have a domain name with you and looking for hosting support only then Bluehost helps you with new hosting plans.
You need to follow some additional steps to update the name servers. Follow this Bluehost name servers guide to do the same.
4) Create Bluehost Account
Now create your Bluehost account and complete the purchase with your account information and billing details.
Now click on the Submit button to complete your bluehost hosting and domain name purchase.
Congratulations!!! You have completed the big part of creating a website process.
Now you need to look for the good content to start writing on your website.
3. Set up your website using WordPress (Single Click)
As of now, you have your registered domain name and web-hosting ready.
Now you need to install a website building platform (we call it CMS). We strongly recommend selecting WordPress blogging software (CMS) which has thousands of free themes and designs. WordPress has many add-ons which helps to make your website good, unique and professional look.
The best part of WordPress is, it will install the WordPress blogging software using single-click. Bluehost has an easy option to install WordPress automatically.
If you do not use Bluehost as your web-hosting service, still you do not worry about WordPress installation. All web hosting provider might have located “WordPress Install” somewhere in the “cPanel“.
1) WordPress Installation on Bluehost.
You might have received a login credential to login into Bluehost account as shown below.
“Yourdomainname.com/wp-admin/ “
1. Log in to your new Bluehost account
2. Click on “My Sites” then Click on “Create Site“.
3. Provide the requested basic information about your website. Now the WordPress installation will start automatically.
4. Once the WordPress installation is done, you will be given login details. Make sure that you have stored this credential safely.
2) Test Your New Website Domain Address
Alright, WordPress installation is over now, next we need to test our new website by typing its domain name.
The easiest way to test your new domain name is, just type your new domain name in the browser.
Open your internet browser and type;
YourDomainName.com
You will see “Hello World” – screen now.
This is the basic appearance of your website. Don’t worry, you can change your website appearance with eye-catching themes and designs easily. We’ll guide you, how to change the themes in this article below.
3) Verify SSL (HTTPS) Settings
SSL (Secure Sockets Layer) is a certificate to ensure that your website is secured and the visitors can browse it safely.
The best part of Bluehost is, it will add SSL automatically when you create a new website and install WordPress application.
How to check SSL status of your website?
1. Login to Bluehost portal
2. Now click on “My Sites“
3. Find your website and click on “Manage Site“.
4. Tab to “Security” tab
5. You will find the SSL status (Free SSL Certificate) under the “Security Certificate” tab.
If everything has gone well then you might see a “lock symbol” in the web-browser before your website address.
Sometimes, SSL configuration may take some time, however you do not need to wait. You can continue to build your website.
4. Customize your Website.
Your website is ready to use with the default themes and settings. But this is not enough; you need to make your website more attractive with eye-catching images and themes.
You need to customize your website with good design, branding elements and themes.
Let’s start and customize your website.
1) Choose a Theme for Your New Website
WordPress themes have great efficiencies with lots of free themes to change the look of your website. As WordPress themes can be changed at any point of time, so you can change your WordPress based on the seasonal or your niche product.
WordPress.org has loaded with thousands of free and paid WordPress themes.
We would suggest you to go with the free WordPress themes from WordPress’s official website WordPress.org. You can grasp your free and popular WordPress themes.
All WordPress free themes have strong user’s feedback and background. You’re free to browse and check all available themes on WordPress themes site.
From our experience we would suggest you to go with WordPress Neve Theme by Themeisle . It is covered with lots of versatile themes and can be used for all types of websites.
We’ll use “Neve Theme” to teach you in this guide.
2) Go to your Admin interface of WordPress.
Type Your website.com/wp-admin and press enter.
You have to use the credentials which you used during WordPress installation.
1. In the sidebar, Go to > “Themes” –> “Add New“.
2. In the search box, just type in “Neve” and then click on the “Install” button to start Theme installation.
3. Once the Neve theme installation is done, click on the “Activate” button.
4. Now you’ll get a success message which confirms that your WordPress Theme installation is done.
Select Theme Features
How to Customize WordPress?
3) Import a Design – Neve Theme Users Only.
Though the Neve theme is active, however you need to do a couple of things to make it good.
Now you will see the welcome message.
The best part of Neve theme is, you will get several ranges of designs to pick. You can see all those by clicking the BIG blue button.
Over 20 designs are available for free. You can use these themes for all these popular niche sites like:
Doesn’t matter what your site is about. You will get all required design packages which fit well for your website.
We’ll take an example with the theme called “Original“.
The installation will take care of all required elements for your site. You will get all needed designs, plugins and test content to make your site great.
Click on the “Import” button now. After a few seconds, you will see the success message as shown below.
Now, go to ‘Appearance –> Neve Options‘ and check the available features.
Let’s see the available options on the Neve theme.
4) Add a Logo for business or site – Logo,
Most of the beginners or when we launch a website, we like to upload our logo. Our website will be displayed on the top of our website.
Let’s start how to add a logo for your website.
If you already have your site logo then you can upload as shown below.
If you don’t have a logo then you can use these logo generators to create your own logo for your site.
Once you have created your website logo, you are good to add it to your site.
Go to “Appearance –> Neve Options” and then click on “Upload Logo“.
Now you need to follow the screen options to complete adding a logo for your site.
This interface is called “WordPress Customizer“. This option helps you to customize your website with various features and appearance.
You can upload your logo as shown in the image. Now, you can crop your website logo if you want or you may skip it.
You can adjust your website logo to be displayed in the left corner, right corner or center of the website.
Site Name & Site Tagline.
Additionally, if you want to display your site name and tagline with the logo then you can set it accordingly.
You need to do some experiments and choose the best fit for your website.
Now click on “publish” button in the top left corner and then click on “X” to exit from the customizer.
5) How to Change Website Color and Fonts?
You have an option to change the color and fonts through some experiment and fix the one which suits based on your likes and needs.
As you are a beginner and learning how to create a website, you need to do some experiments with various colors and fonts to fine-tune your brand identity.
1. Go to ‘Appearance –> Neve Options> and then change set colors and customize fonts.
2. Click on “Set Colors“
3. You can customize your color using WordPress Customizer.
4. You can select your favorite color and click on “Publish” and then click the “X” button.
Likewise, you may change the Fonts.
1. Click on the “Customize Fonts” –> “Appearance –> Neve Options” panel.
2. Click on the Font Family and select your desirable fonts for your website.
You need to do some experiments for your headings and text content.
Once you have selected your favorite font then click on “Publish and X” to confirm it.
WordPress Customization:
6) Add a Sidebar on Your Website
Go to “Appearance –> Neve Options” to set your sidebar for your website.
Click on “Content / Sidebar“
Now you will see 3 options like,
Keeping the sidebar on the right of the website is the classic layout of most of the recent websites.
Here is the place to set the content width and click on publish and X button to confirm the setting changes.
7) Add Widgets
Widgets are like small content blocks which will appear in your website’s sidebars. We have just completed the sidebar above and now, we need to customize our website widgets.
How to configure Widgets?
Go to “Appearance –> Widgets” like shown below.
You can see the “available widgets” on the left side and you can see the widget areas supported by the current theme.
When you want to place a widget, just click on it then drag and drop in the sidebar area.
8) Theme Customization
So far, what you have done is more than enough to learn how to create a website and look original. However, there are many more features available to experiment with the theme customization.
Go To “Appearance –> Customize” and it will show all other required information to build your website with many features.
9. How to Install Plugin?
5. Add Content and Pages to Your Website
A website is not fulfilled without having pages. Web pages are a collection of documents on the internet.
You need to create web-pages in WordPress which is pretty simple.
What are essential pages needed when you launch a new website?
Home page – This is the first page of your website, when most of the users land on.
About page – Here you need to explain about your website to your visitors / users.
Contact page – This page has your contact details.
Blog page – Here you will list your recent blog posts.
Services page – If your new website is for business related then you need to showcase your services here.
Shop page – If you’re planning to build an eCommerce store then you need to elaborate here.
All the pages explained above are similar in the structure. If you learn how to create a page then you can easily manage the creation of other pages.
If you want to create a page or post, then click on “Add New” to start creating your first page or first post.
6. Set-Up a Navigation Menu for Your Website
Now you have learnt how to create a website and now, you need to set up your website menu or navigation menu.
Navigation menu is the tab which visitors used to move from page to page.
Go To “Appearance –> Menu” and click on “Create a New Menu“.
You may follow step by step instructions to create a menu for your website.
Congrats! You’re good to launch your Website!
What Next?
Alright, now you have built your website and your site is 100% live. Anyone can access your website anywhere in the world.
Without website traffic, you cannot do anything. So this is the time for website traffic and promotion.
You need to look for several ways to get traffic to your website. There are many ways to get quality traffic to your newly created website.
All you need is, you need to study more to know how to get traffic to your new website.
Once you get enough traffic to your recently launched website then you may apply for the best affiliate programs to run from your site.
There are many legitimate affiliate programs available on the internet. Once you get approval from their affiliate network then you can place their ad unit or affiliate link on your website. Here is the complete guide for affiliate marketing.
Whenever a user clicks on the affiliate link and promotes for a sale then you will get affiliate commission for the sale.
Tips for Creating a Website
Stand on your customers or visitors’ shoes and think of what they are really looking for.
Build your website professionally, otherwise it can potentially put off your visitors.
Have a habit to update your website on a regular basis. If your website is based on the product’s price.
Ensure that you have entered your correct contact details like email address and phone number.
Find many ways to promote your newly created website.
Find out the best ways to make your website searchable on the search engines like Google, bing, Yahoo, etc.
I hope you might have created your website using this simple tutorial on how to create a website easily.
Our “how to make a website and make money” guide will be very easy and fun to start your first website for your business.
We always suggest looking for a good domain name and web hosting provider to get unstopped service to the users.
This content was originally published here.